Difference between revisions of "Using Git Example"
From Genome Analysis Wiki
Jump to navigationJump to search| Line 1: | Line 1: | ||
| − | == | + | == Create new Bare Repository == |
| − | + | {| border="1" | |
| − | + | |valign="top"| | |
| − | |||
| − | = | ||
| − | |||
These steps will create a new bare repository called learningGit in ~/code/learnGit/bareRepo/. | These steps will create a new bare repository called learningGit in ~/code/learnGit/bareRepo/. | ||
| Line 18: | Line 15: | ||
cd learningGit | cd learningGit | ||
ls | ls | ||
| + | |[[Image:CreateNewGitRepository.png]] | ||
| + | |} | ||
| + | |||
| + | == Add the First Set of Files to the Repository == | ||
| + | |||
| + | There are multiple steps for adding the files: | ||
| + | # Creating a repository with a working directory | ||
| + | # Creating the files | ||
| + | # Staging the files | ||
| + | # Committing the files | ||
| + | # Pushing the files to the bare repository. | ||
| − | + | {| border="1" | |
| + | |valign="top"| | ||
| + | === Create a Working Repository === | ||
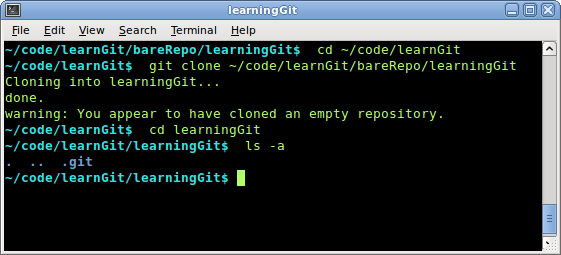
| + | These steps will create a new working repository called learningGit in ~/code/learnGit/ that is a clone of ~/code/learnGit/bareRepo/. | ||
| − | + | # Move to the appropriate directory | |
| + | # Clone the initial repository | ||
| + | # Move into the working directory | ||
| + | # Look at the contents (Note: in this example, learningGit has not yet had any files added to it) | ||
| − | |||
| − | |||
| − | |||
| − | |||
| − | |||
| − | |||
cd ~/code/learnGit | cd ~/code/learnGit | ||
git clone ~/code/learnGit/bareRepo/learningGit | git clone ~/code/learnGit/bareRepo/learningGit | ||
cd learningGit | cd learningGit | ||
ls -a | ls -a | ||
| + | | | ||
| + | [[Image:GitEmptyRepo.png]] | ||
| + | |- | ||
| + | |valign="top"| | ||
| + | === Create the New Files === | ||
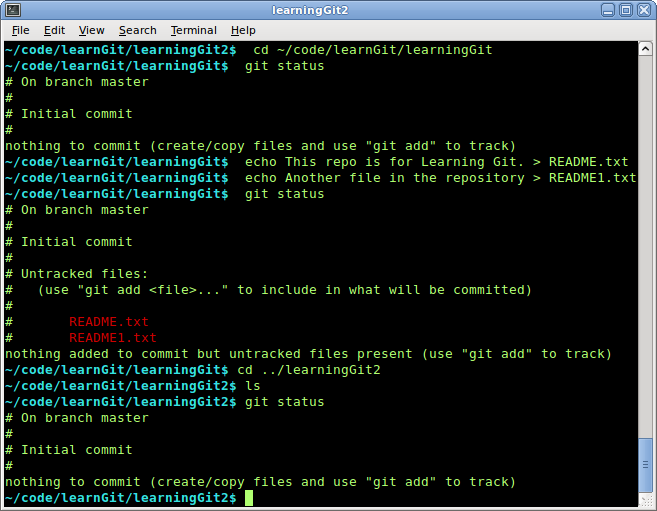
| + | These steps create README.txt and README1.txt in ~/code/learnGit/. | ||
| + | |||
| + | # Create README.txt | ||
| + | # Create README1.txt | ||
| + | # Look at the git status to see 2 untracked files. | ||
| + | echo This repo is for Learning Git. > README.txt | ||
| + | echo Another file in the repository > README1.txt | ||
| + | git status | ||
| + | |||
| + | Note: the files are not yet stored in the repository. | ||
| + | |[[Image:GitNewFiles.png]] | ||
| + | |- | ||
| + | |valign="top"| | ||
| + | ===Stage the files=== | ||
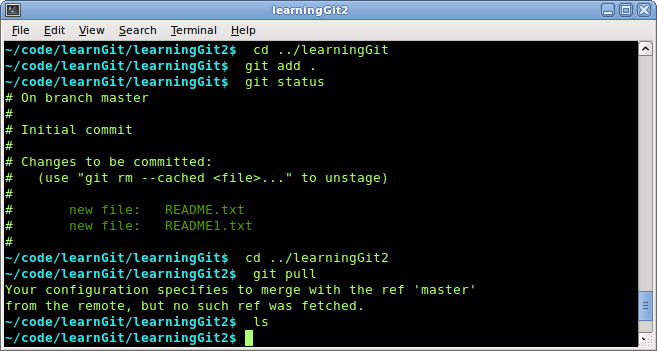
| + | This step stages the addition of README.txt and README1.txt | ||
| + | |||
| + | # Stage the files | ||
| + | # Look at the git status to see 2 staged files. | ||
| + | git add . | ||
| + | git status | ||
| + | |||
| + | Note: the files are staged, but not yet stored in the repository. | ||
| + | |[[Image:GitStageFiles.png]] | ||
| + | |- | ||
| + | |valign="top"| | ||
| + | === Commit the Files === | ||
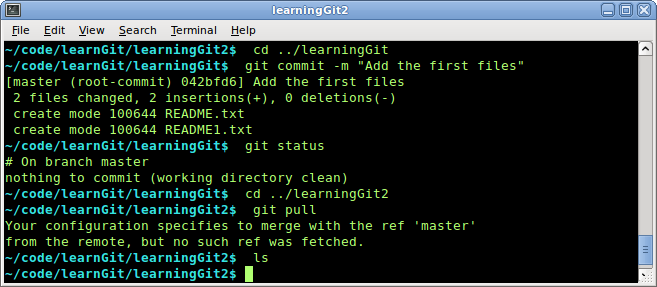
| + | This step stores README.txt and README1.txt in the local repository. | ||
| + | |||
| + | # Commit the files | ||
| + | # Look at the git status to see no uncommitted changes. | ||
| + | git commit -m "Add the first files" | ||
| + | git status | ||
| + | |||
| + | Note: the files are stored in the local repository, but are not yet in the bare repository. | ||
| + | |[[Image:GitCommit.png]] | ||
| + | |- | ||
| + | |valign="top"| | ||
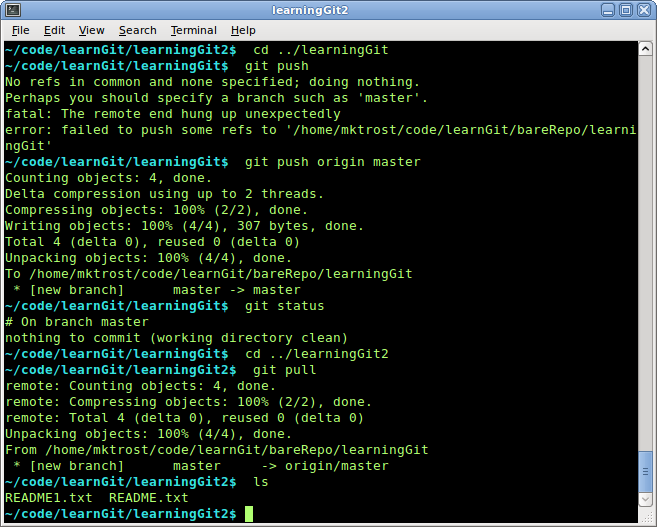
| + | === Push the files to the bare repository === | ||
| + | This step pushes the files to the bare repository. | ||
| + | |||
| + | # Push the files without specifying the remote or branch (fails) | ||
| + | # Push the files specifying the remote and the branch (succeeds) | ||
| + | git push | ||
| + | git push origin master | ||
| + | |[[Image:GitPush.png]] | ||
| + | |} | ||
| + | |||
| + | |||
| + | == Clone Pre Existing Repository == | ||
Revision as of 20:59, 7 July 2011
Create new Bare Repository
Add the First Set of Files to the Repository
There are multiple steps for adding the files:
- Creating a repository with a working directory
- Creating the files
- Staging the files
- Committing the files
- Pushing the files to the bare repository.

